Friday, September 30, 2011

Day 5: Come Celebrate Christmas with Pixie!

Day 5 brings us to "E" is for "Eskimo".
Isn't he adorable?

I added some "Dress It Up" buttons from my stash. My daughter gave me the icicles. I had them in my stash for years, back when I was into scrapbooking Big Time!
This little Eskimo is now available in the Pixie Dust Studio. I hope you're enjoying Pixie's Christmas! We'll have more images for you on Monday. I hope you'll join us!

Thursday, September 29, 2011

"What's Your Favorite Book or Movie this Week?" at Pixie Dust Studio

The post for Day 4 of "15 Days of a Pixie Christmas is directly below this one.
 Your challenge this week, if you agree to accept it, is to create a project based on your favorite book or movie.
Can you guess what I chose? It does double duty as a book and a movie! It was also an excuse to make another page for my never-ending Twi book! 

Here is a close up of the scroll with a quote.
If you want to see more pages in my book, click HERE.
The Pixies want to know what your favorite book or movie is!
Enter your project HERE for a chance to win a Pixie Dust image of your choice and a Pixie Star Award Badge for your blog. Need some inspiration? Stop by the blogs of the talented Pixies to see the images they are showcasing. Their links are in my sidebar. Stop by the Pixie Dust Studio and choose your favorite image!

Day 4 of Pixie's Christmas!


Day 4 brings us to "I" is for "Ingredients".
This little guy is delicious and would make a yummy addition to your holiday images!
Stop by the Pixie Dust Studio to pick up your Christmas ingredients. Another image will be released tomorrow!

Wednesday, September 28, 2011

Day 3: Pixie's Christmas Adventure Continues!


Today's image is "X" is for "X-Rated Snowman".

I couldn't help but laugh when I saw this cute image! If you want it, it's now available in the Pixie Dust Studio.  I hope you're enjoying this fun Christmas adventure! Another image will be released tomorrow!

Tuesday, September 27, 2011

Day 2 of Pixie's Christmas!


Today's image is "I" is for "I Love Ornaments".
It is available now in the Pixie Dust Studio. Stop by tomorrow to see the newest image in Pixie's Christmas adventure!

Monday, September 26, 2011

Let the Pixie Christmas Festivities Begin!

15 Days of a Pixie Christmas starts today!

"P" is for "Pixie Claus", and she is available in the Pixie Dust Studio today! A new image will be released M-F over the next three weeks. (15 images in all.) Guess what we're spelling? Why, Pixie Dust Studio, of course! Come join us on Pixie's very fun holiday adventure!
Stop by tomorrow for a peek at the next image to be released.

Sunday, September 25, 2011

Happy Anniversary to....

My DS and DDIL!
If you follow my blog you know that my youngest son got married last year. The first anniversary gift is paper. I was trying to think of something unique that I could make for this special anniversary. I came across Sally Ann's fabulous blog and saw her amazing explosion box! This was no ordinary explosion box. It had a CAKE inside! I was in LOVE and knew that I had found the perfect gift for my dear son and dear daughter-in-law! Sally was kind enough to post the tutorial for making this adorable creation on her blog "Sazzle Craft".
This is my version:

When the lid is removed this is what you see:
Photos from their wedding. All of the photos were taken by me. I printed them out in wallet size, rounded the corners, and attached. CS is Bazzill and DP is Miss Elizabeth.

Here is a bird's eye view.

The cake is removable. The flaps lift up and have photos on both sides for a total of 12 pages in the mini photo album.

I think I had the most fun making the cake.

I made their wedding cake for the reception too. I had leftover sequined ribbon and satin ribbon that was used on the actual cake, so I used that on the paper cake. The flowers were sprayed with Turquoise Blue Glimmer Mist from Tattered Angels.  The leaves were painted with acrylic paint to match the ribbons. The silver and pearls picks and flowers were purchased at Hobby Lobby.

 I used smaller flowers on the paper cake and sprayed them. I also saved pearls to add to the flowers. The leaves on the paper cake were punched using a Creative Memories punch. The main difference between the two cakes is that the paper cake is three tierss, while the wedding cake is two. I promised the newly weds that I would make a matching 6" two layer cake for their first anniversary. Why have a year old frozen cake for your anniversary when Mom can bake you a fresh one that looks just like the wedding cake? LOL
This is a closeup of the tag. The flower, pearls, and leaves were on their actual wedding cake. Thank you, Sally Ann for coming up with this amazing idea! I think it is the perfect gift for a first "paper wedding anniversary".
Don't forget to check out Sally Ann's tutorial. You'll be glad you did!

Friday, September 23, 2011

It's Release Day for "Pixie of Oz" at Pixie Dust Studio!!!!!

Today is the day! It's Release Day for the newest Pixie Dust Collection "Pixie of Oz"!
This collection is HUGE! It includes ELEVEN digital images and ONE digital sentiment!
 Click your heels together three times and zap yourself over to the Pixie Dust Studio to see the special price for the entire collection!
This image is "No Place Like Home" and it's one of my favorites. I thought about this card for several days before deciding on this LO. I like the way it gives the feel of a tornado with objects flying around. All of the DP is from the Graphic 45, Magic of Oz Collection.
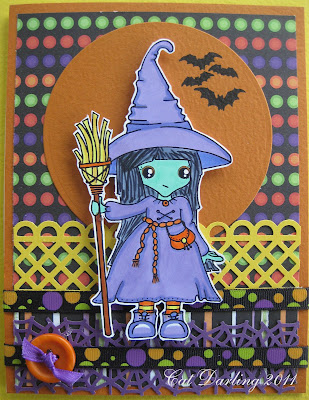
I used "Good Witch or Bad Witch" to make a Halloween card. I couldn't resist making a clothesline. Any excuse to use those adorable mini clothespins! The Bat DP is Fright "Night", by Jazzy Patterns from My Grafico.

My last card uses "Munkins". Such a cute little couple! I thought they would look adorable on a Christmas card, and they do!
I hope you've enjoyed your three day journey through the Land of Oz. I certainly had a blast creating all of these projects using such amazing images! Skip on over to the blogs of our creative Pixies and see their versions of the Land of Oz. Their links are in my sidebar. Don't forget to stop by the Studio to purchase your images! Repeat after me:
There's no place like Pixie Dust Studio!
 There's no place like Pixie Dust Studio!  
  There's no place like Pixie Dust Studio!  

Thursday, September 22, 2011

Day Two of Sneak Peeks for "Pixie of Oz"!

This week's Pixie Challenge "Going Round and Round" is below this post.
Today we continue on our journey of the Land of Oz.
This is "Pixie Dorothy and Prince Toto". The shoes were cut from Graphic 45 DP, Magic of Oz Collection. The dress and bows were paper pieced using paper from The Paper Studio. The sentiment is my own. You can never have enough shoes! 

Sentiment Inside: "That's how many in dog years?"
Here's "Prince Toto" all ready to celebrate! His hat is a "Dress It Up" button. DP is from The Paper Studio. The candles were also cut from DP. Sentiments are from "Shirley's 2 Girls".

This is "Good Pixie of the South". Wouldn't she make a gorgeous birthday card for a little girl? I paper pieced the skirt of her dress. Hubby said she was "Too PINK"! Is there such a thing????
Here is "Wicked Pixie of the West". I couldn't resist using her on a Halloween card. The bats were stamped with a Hero Arts stamp. I LOVE my MS spider web punch!

      Follow the yellow brick road to our talented Pixies blogs! Their links are in my sidebar. Tomorrow is RELEASE DAY for the Pixie of Oz Collection! I'll have more peeks for you then. I hope you'll stop by and visit!

"Going Round and Round" this Week at Pixie Dust Studio!

We're going Round 'n Round this week at Pixie Dust! No, we're not spinning  in circles. We're using circles on our projects this week!
I needed more pages for my never-ending Twi book, and I (GASP) had not used this image yet! So the time had come! I used circles cut from paper and round buttons. Kathy has a variety of Twilight images in the Pixie Dust Studio. Check them out, and you may be inspired to create your own Twilight book!
 Here is a closer look at the quote that I chose from the book. 

If you missed any pages in my Twi Book, you can view them all HERE.
 I hope you'll join us for this week's challenge!
Enter your project HERE for a chance to win a Pixie Dust image of your choice and a Pixie Star Award Badge for your blog. Need some inspiration? Stop by the blogs of the talented Pixies to see the images they are showcasing. Their links are in my sidebar. Stop by the Pixie Dust Studio and see all of the adorable images from which to choose!

Wednesday, September 21, 2011

Day One of Sneak Peeks for the "Pixie of Oz" Collection!

     I remember when I was six years old and I saw the "Wizard of Oz" for the very first time. I was absolutely terrified of the Flying Monkeys. I actually hid under the covers that night and prayed really, really hard that those winged things wouldn't come into my bedroom and get me in the middle of the night! Kids today see a lot worse things on TV than Flying Monkeys, so they laugh when I tell them this story. 
Fast forward to now, and I still don't want to see a REAL Flying Monkey, but I did find a sign in a shop that made me laugh. I have waited several years to use this sentiment on a card. It was just perfect for this week's release from the Pixie Dust Studio, "Pixie of Oz".

     This toooo cute image is "Cute Flying Monkey". This Pixie Dust Release is timed perfectly to use with the newest Graphic 45 DP, "The Magic of Oz" Collection. That's where I got the two monkeys in the right hand corner.
      I also used a sheet of small "postage" stamps from Graphic 45 on my next project. I had never made a teepee card before, so I thought I would give it a try. This is what I came up with.

This image is "Brainy". I used a MS punch to make the fence to simulate a fence around a garden or farmer's field. I also added some "Got Flowers" and an insect button from "Dress It Up".

     This is"Tin Heart". I added embossed hearts cut with Nesties and Creative Memories punches. The flowers are from Recollections.
     The last image is "Courage". I added some yellow polka dot paper to simulate the Yellow Brick Road. The red flowers are "Got Flowers" from the Field of Poppies scene. The card stands up with the help of Velcro dots. 
     This is what it looks like when flattened out.  

It can be folded in half or.....
....in fourths for easy storage or mailing.
Do you know that the Winged Monkeys were slaves of the Wicked Witch? Do you know how the Scarecrow came to be? Did you know that the Tin Man was not always made of tin? You really need to read The Wizard of Oz by L. Frank Baum. It's one of my favorites! My favorite chapter depicts a China World which was not mentioned in the movie. I can't wait until my grandkids are old enough for me to read it to them!
 Stop by the blogs of our talented Pixies! They will take you to the Land of Oz! Their links are in my sidebar. I'll also have more peeks for you tomorrow. The Release Day is Friday. You don't want to miss it! This collection is HUGE!!!
For some fun trivia and frequently asked questions regarding The Wizard of Oz go to this website HERE.

Thursday, September 15, 2011

"Recycle!" this Week at Pixie Dust Studio!

The challenge at Pixie Dust Studio is to recycle something that you have around the house that would normally be tossed out.
I chose the image "Frankie's Fun House Fairy" from the Pixie Dust Fun House Collection.
The flowers were made from a recycled brown paper lunch bag. A portion was cut from the bag and sprayed front and back with Krylon Make It Acid Free spray. Then two flowers were layered, glued to the card, and a rhinestone was placed in the center.
Can you guess what else was recycled? The shaker was made from a plastic flower container!
I have a tutorial at the bottom of this post that explains how I did it.
 What will you find around the house for this week's challenge?
Enter your project HERE for a chance to win a Pixie Dust image of your choice and a Pixie Star Award Badge for your blog. Need some inspiration? Stop by the blogs of the talented Pixies to see the images they are showcasing. Their links are in my sidebar. Stop by the Pixie Dust Studio and see all of the adorable images that are available!
Pixie Tip 
(also for Top Tip Tuesday)
*If you want to make a shaker for a card like I did here's how:

This is a Recollections container for paper flowers that was purchased at Michael's.
How was it transformed into a shaker? Here are the deets:
Attach to card with glue. Voila! You just made a shaker card!
CHALLENGES
Stamp Something- Anything Goes
Cute Card Thursday- Anything Goes
Paper Play Challenges- Punches and Dies
Delicious Doodles- Fresh New Start (New idea for making a shaker)
*Top Tip Tuesday- Recycle a flower container into a shaker