Showing posts with label April in Paris. Show all posts

Thursday, April 15, 2010

S2G TT April in Paris Continues!

Bonjour mes amis ! Bienvenue à la deuxième semaine d'avril à Paris!
Ahhh... Paris in the Springtime! Sounds wonderful!
From The Girls:
'Chanel is ready to strut her stuff! This week we're giving you a snapshot of a scene that takes us back to one of our favorite little villages in France. Don't you love the sweet yellow bicycle with the Menu board on it? We'd love you to take a look at our 'oh so french' picture and let it guide you for this weeks... Shirleys2Girls Twisted Thursday !Whether it is the color palette, the sunflowers,or anything else in the photo...JUST GO FOR IT!"

Let's take a look at "La Salon". I tried for a "French" look. My "Guys" thought it looked French, so I am happy! I chose pink and black from the photo. .....Look really hard and you'll see those colors!  ;)
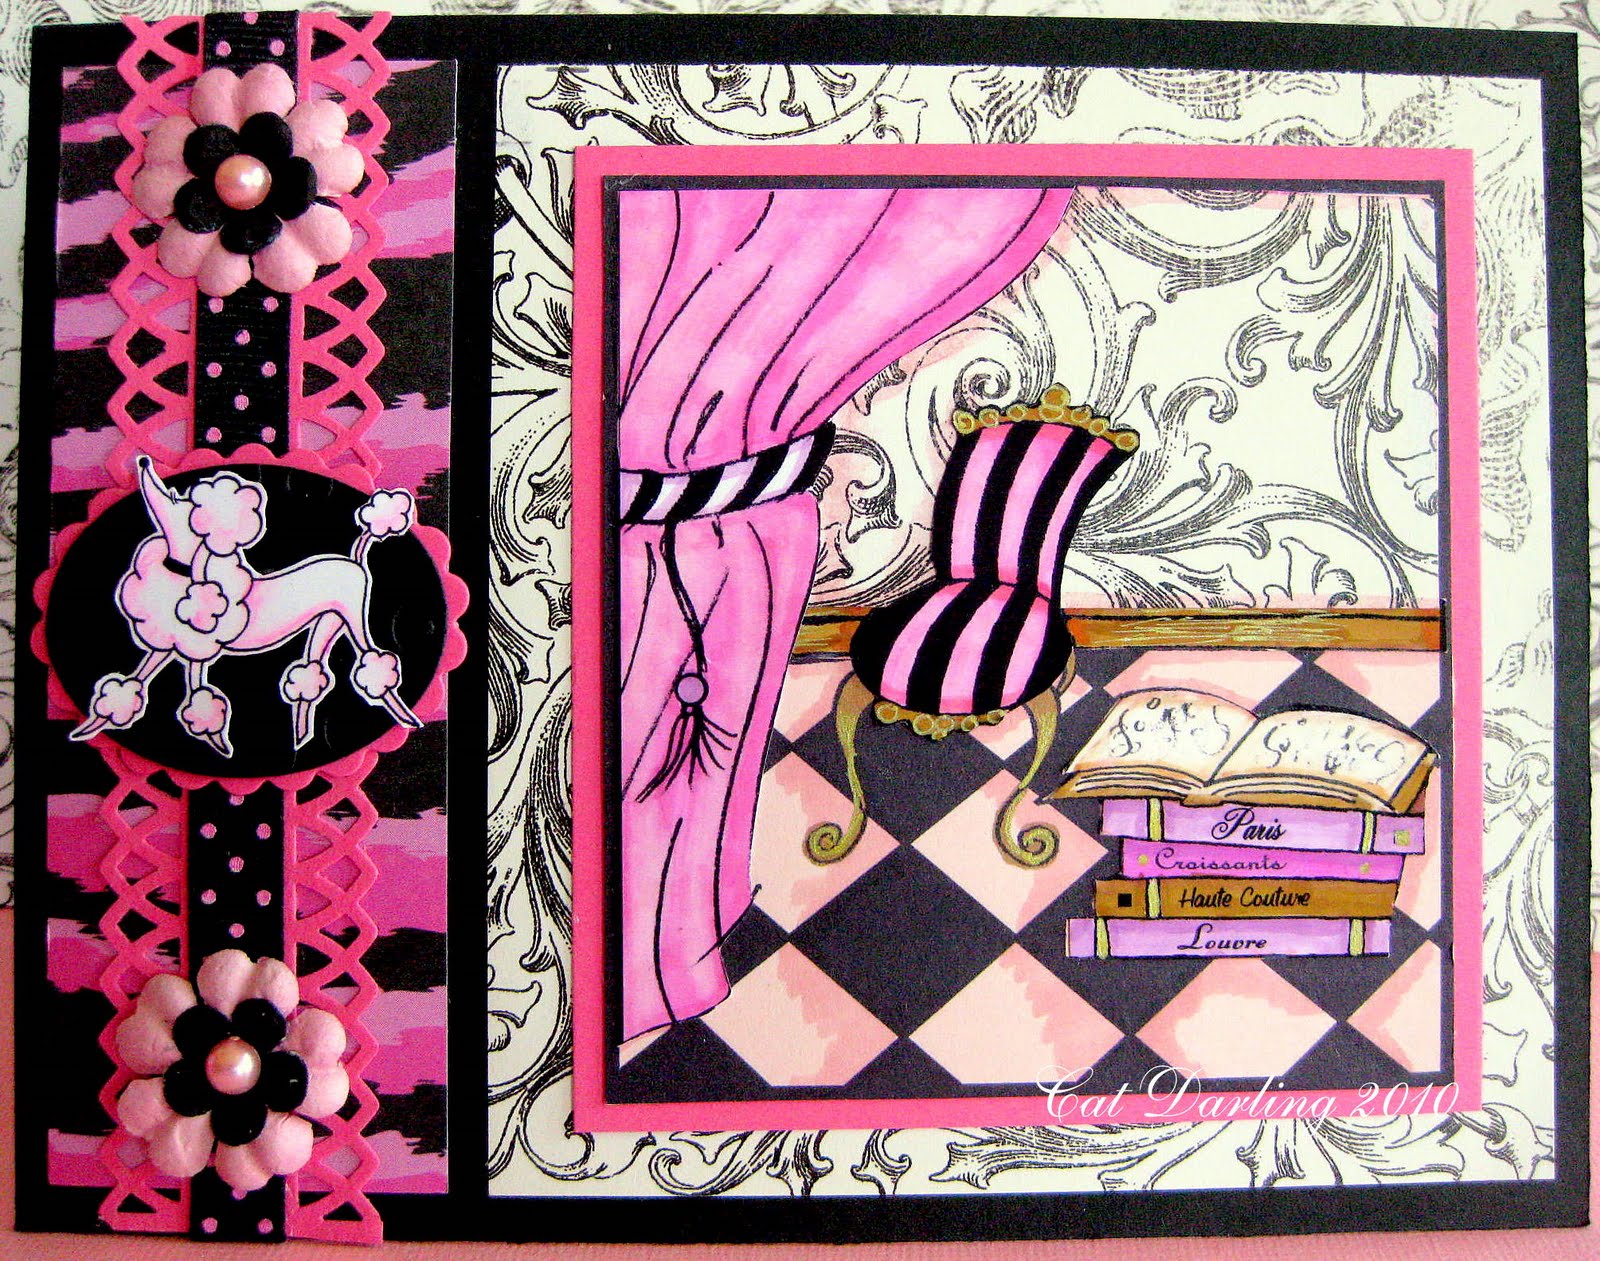
Isn't this room gorgeous? I "papered the wall three times before I was satisfied with the just the "right" look! It certainly was easier than papering my own livingroom! LOL  As soon as I saw this digi, I knew that I wanted to use pink, black, and white. I went looking for inspirational paper, and I had some "Formal Affair" from Scrapworks in my stash. Then I found some "Black and Pink Zebra" at Hobby Lobby. CS is Papertrey Ink. I needed some black flowers, so I colored them with a Bic pen. Pink pearls were added to the centers. I didn't have any black ribbon with pink dots, so I colored the white dots pink. I made a "Cameo pin" featuring Chanel using Nesties and a Dry Embossing folder.
I coudn't stop with just a card! I love the stripes on the chair, and I love the zebra paper! People often ask me where I get my inspiration. Most people will say, "From nature, or pictures in magazines." Not me! I get inspired just walking through a Dollar Store! I found this really unique hexagon box while looking for inspiration. It just cried out, "Alter me!" So I did! I added some of the same embellishments to the box that I used on the card. I also had to add "Chanel" S2G newest little dog who is a "French" poodle. Chanel comes with one of the digis I used last week, "Grand Tresors".
Here is a close up of the flower that I made for the top of the box. I layered and folded Nesties, and distress inked around the edges with black ink to add dimension. I fringed a circle and held it all together with a rhinestone brad.
Next I made a tag also using Chanel and some of the same embellishments as the card. Travel around to the rest of the DT's blogs. They have some fabulous French Inspiration to share with you! Their links are in my sidebar. Be inspired and share YOUR French inspiration at the S2G Challenge Blog. We'll be watching for your entry! There will two winners chosen by Random Org who will each receive a Free digi and a Winner's Icon for their blogs. All of the S2G French Digis are available in the S2G Shop now.  Hop on over! They are FABULOUS! 
How would you like a FREE FRENCH DIGI? Join SNR! We need one more member to reach 300, and the Girls will post a Freebie for us! Click on the turquoise button at the bottom right of my blog and join now.
My card also fits:
1. Allsorts- Petals and Pearls over
2. Lexi's Creations-Any Altered Object over
3. Crafty Angels- My Favorite Things (boxes) over
4. My Time to Craft- Pretty Pearls over
5. Digital Tuesday- Paper Piece with Digitals over
6. Penny's Paper Crafty - Anything Goes
7. Little Red Wagon- Dry Embossing (Poodle tag and Medallion on card)
8. Creative Belli- Die Cut Shapes
9. Simon Says- (French) Movies and Dry Embossing

Tuesday, April 13, 2010

April in Paris S2G Blog Hop!

The April in Paris Blog Hop will remain at the top of my blog until Wednesday, April 14, 2:59 A.M. (PST). Scroll down for newer posts.
Bonjour, mes amis! Bienvenue a la Rue de Maitre Albert! 
Welcome to la Rue de Maitre Albert for my part of this fabulous little Paris tour. If you came here from Rue du Chateau (Anne's Blog) then you are in the right place. If you just happened upon my blog, start at the beginning at the S2G Challenge Blog HERE.
This is my first project, "Grand Tresors" featuring Coco and her little French poodle, Chanel. I paper pieced Coco's dress and added Stickles to her hat, package, and flowers. Chanel also has some purple Stickles added to her "Doggie Do".  She likes to look her best! What "Grand Tresors" might Coco have in her boxes?
Perhaps she has a little French *purse featuring a little poodle on the clasp that looks amazingly like Chanel....because it is Chanel! I colored and cut out Chanel from the very same digi image and placed her on the purse.

A trip to Paris isn't complete without a stop at the Eiffel Tower, and that's where we are headed. So hop on your bicycle and follow Coco!
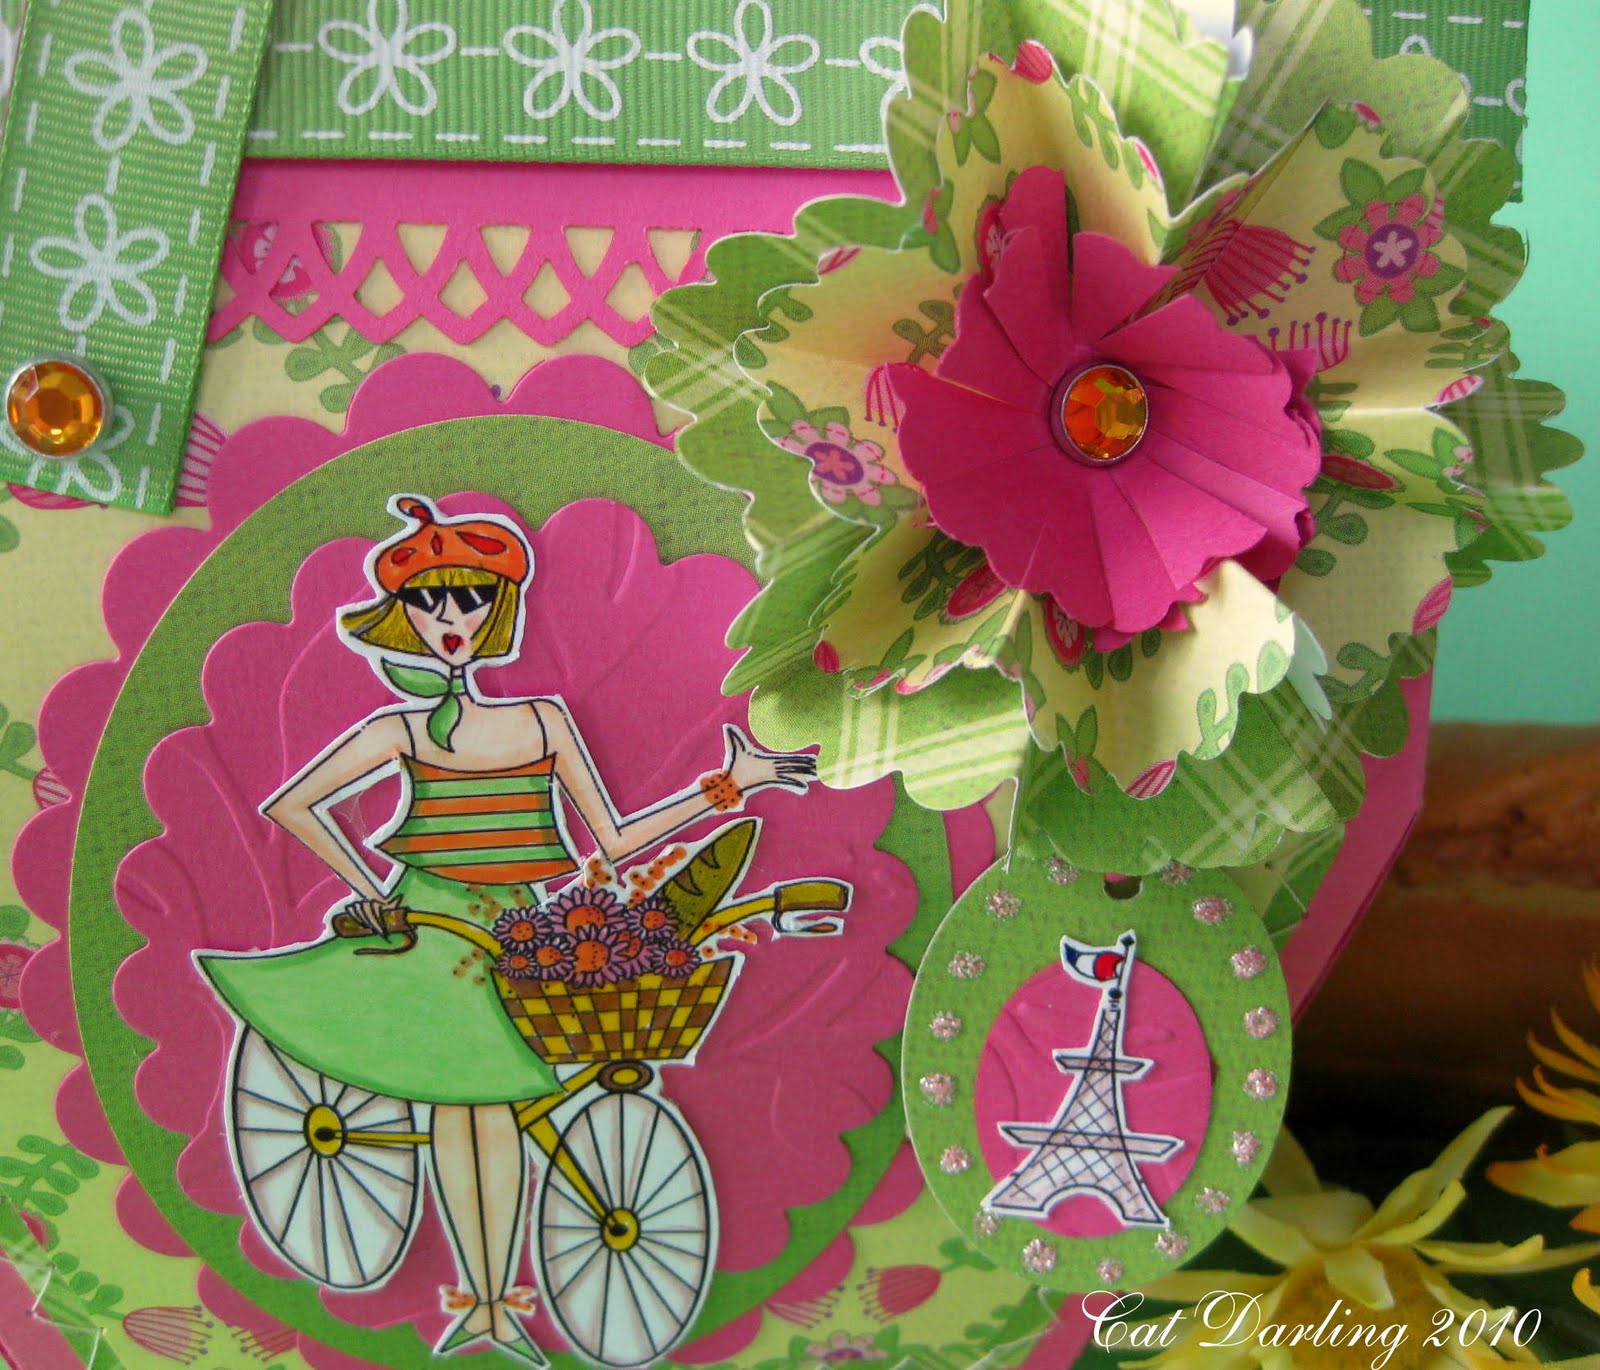
This image is "Tres Francais" and what could be more French than the Eiffel Tower? Chanel even has a basket filled with flowers and French bread. I was inspired to make a **basket and a large matching paper flower. I used the Eiffel Tower image (included with this digi) to make a hanging tag.
When I was six years old I decided that I wanted to be an artist. I had this "vision" in my head that I was standing in front of the Eiffel Tower, and I was wearing a beret. Behind me was a fence, and hanging there were all of my many paintings which were for sale. I never did go to Paris. But I did major in Art in college, and I taught Art, too. This cute digi just reminded me of one of my childhood dreams.
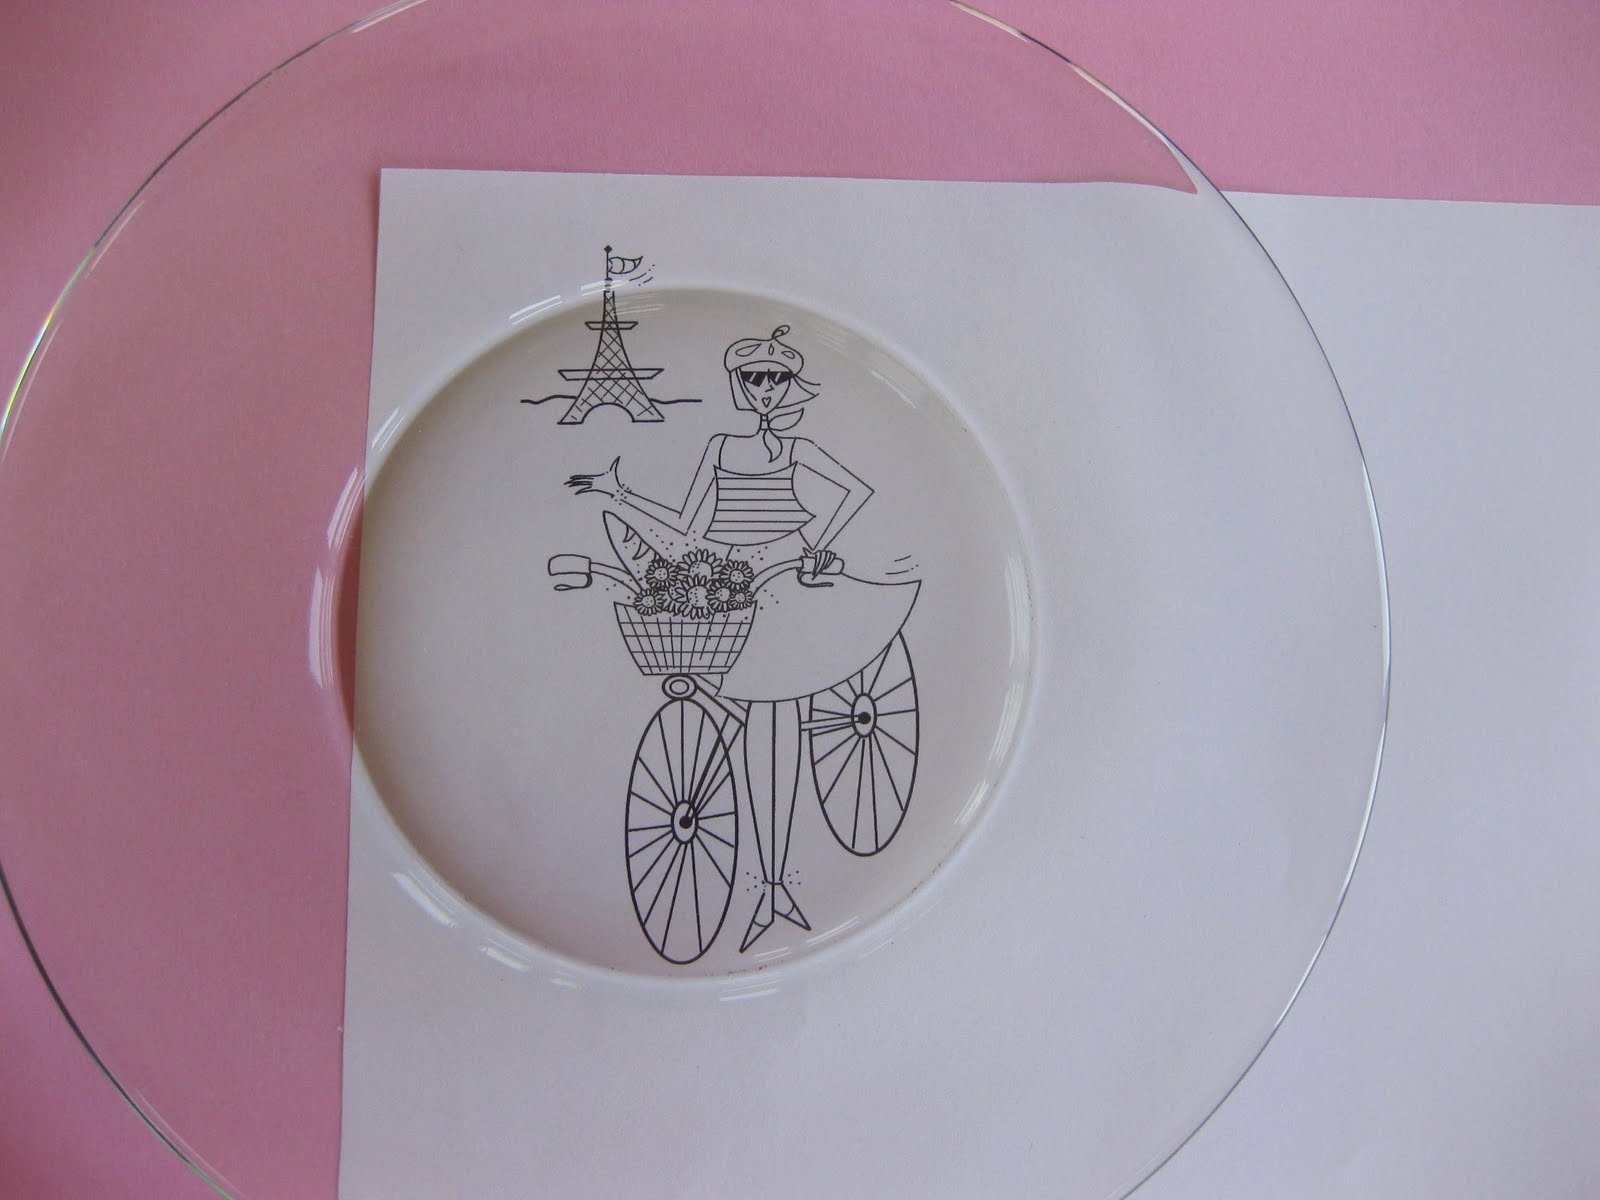
 Here is another project using the same digi stamp, "Tres Francais". This was a fun project! I purchased a clear plate at Hobby Lobby, washed it with soap and water, and then wiped it with rubbing alcohol and a clean cloth. I drew a border on the BACK of the plate using Vitrea Transparent Markers (Michael's). Allow to dry for 24 hours. Then bake in the oven for 40 minutes at 160 degrees. The label says that the project is dishwasher safe.
This part of the project is NOT dishwasher safe. I used Grafix Rub-On paper (Hobby Lobby) to make a decal, colored it with Copics, and applied it, following directions on the package. I applied the image to the BACK of the plate. You can spray the decal when finished, but it often looks cloudy, so I chose to "paint" it with clear nail polish.
Did you notice that the image on the plate and on the basket have been flipped? Another great reason to love digis!
 I hope you enjoyed my part of the April in Paris tour!
We’ll pick 3 winners from the challenge blog comments, so be sure to leave some love on all the DT's blogs! 
There will also be
ONE GRAND PRIZE!
Tres Chic!
After  the Hop, stop by the S2G Shop. I know you'll want to snap up some of these fresh, new images! 
Don’t forget to play along with us and our Twisted Thursday Challenge. The TWIST is to use the word MERCI on your card/project. Upload your project HERE.
Now for your next stop on your tour, head over to Rue de St. Julien-le-Pauvre (Deanne's Blog) for another fabulous project. If you get lost along the way, head back over to the S2G Challenge Blog for your road map.
Who wants a FREE French Digi?
If you haven't joined the S2G Discussion Forum at SNR now is the time! We need ONE more member to reach 300, and we will receive a FREE DIGI from S2G! Scroll over the turquoise SNR button near the bottom of my blog. Click "Join Now" and follow the instructions.
My Timeless Templates *Purse-onality, **Pack a Picnic. DCWV "Flower Shower Stack", MS punches, Bazzill CS.

Tutorial: Digital Image on a Plate

This is a plate that I decorated for S2G's April in Paris Blog Hop. I had so many comments on this plate! Today I'm going to show you how to make your very own.
Here's what you'll need: a clear glass plate, rubbing alcohol, clear nail polish, paper towels, a craft stick, pencil, plain white copy paper, a nickel, markers (I used Copics and Bic.), Vitrea Frosted markers ( I used Orange and Mint.), and one package Grafix Rub-Onz Paper.
Wash the glass plate with soap and water. Rinse and dry. Wipe the plate with rubbing alcohol and a paper towel. Dry and set aside. Cut a section of white copy paper and trace around a nickel. Draw a line through the center of the circle.
Place a dot to the left of the circle to use as a guide for placement of the scallops. Turn the plate face down. Position the circle near the edge of the plate and trace that portion of the plate's rim.
Now you have a paper guide that you can move around the plate and be able to make all of the scallops the same size at an equal distance apart. As you paint around the plate, and see that you are near the end, you can adjust the distance closer or farther apart. If you make a mistake, the paint can be removed with rubbing alcohol or nail polish remover.
After your scallops are complete, go back and draw a small dot at each end.
Now draw a dot in the center of each scallop and in between each one. Allow to dry for 24 hours. Set the plate on a cookie sheet and place in a cold oven. Preheat to 170 degrees, and then bake for 35 minutes. Allow the oven to cool for at least an hour after baking before opening the door. I cracked the oven open a few inches and allowed the plate an additional 20 minutes to cool before removing it.
When completely cool, wipe the bottom center of the plate with a paper towel slightly moistened with alcohol. Set aside.
This part of the project is NOT dishwasher safe.
Choose your digital image and drop into a Word Program. I used S2G's "Tres Francais". Use the ruler guide at the top to choose an approximate size that will fit on your plate. Place it in the corner of the screen to conserve paper when printing.
Print the image out on copy paper and measure it against the plate. Adjust the size if needed. When the digital image is the correct size, you are ready to print it on the Grafix paper. The package contains two types of paper: Transfer Film- one side matte or frosted, one side shiny, and Adhesive Film- one side glossy and one side white liner.
Print your image on the Transfer Film; matte side. Now you are ready to color your image. Color small sections with the Copic blender and while still wet apply color on top. Don't press too hard or go over the image too many times, or your paper will tear. How do I know that? LOL
Cut a piece of the Grafix Adhesive Film that is slightly smaller than the Transfer Film that your image was printed on.
Slowly peel the Adhesive Film away from the white liner. Discard liner.
Carefully place film, sticky side down, on top of the image. Holding the film in one hand, I start at the bottom and carefully smooth the film, working my way to the top.
Rub the craft stick in a circular motion over the digital image, forcing out any air bubbles, and ensuring that the film sticks well to the image.
Turn the craft stick on its side,  and press firmly sliding to the outer edges. Work from the center outwards, and you should be able to remove any remaining air bubbles.
Cut the digital image out leaving a very small border around the outer edges.
When cut out, turn the craft stick on its side again, and carefully rub over the image again.
Turn the plate face down, and position the images where they look best.
Remove the clear film from the images. Discard film.
Carefully place images on back side of plate, sticky side down. The white backing is still attached. Rub again in a circular motion securing the image to the plate. As you rub, the white backing will begin to loosen.
When decal is firmly attached, the white backing will seperate and can then be discarded. Do not rush this process. If it won't lift off easily, it needs more rubbing. 
One last chance, if the digi needs touching up, now is the time!
Give the digi two coats of clear nail polish. Try not to paint too far outside the edges of the image.
Now you have a gorgeous plate that you made yourself! When it's finished, don't look for flaws. Chances are no one will notice any unless you point them out. Besides, it's handmade. That's part of its beauty!
Display and enjoy!