
Are you ready for Easter? The Softpencil DT is! We have projects this week featuring one of Elizabeth's newest digital images.

This image is "Molly, Timmy, and the Baby Chick".
 Here it is all colored up with Copic Markers.
Have you checked out the Softpencil Studio yet? Elizabeth has been very busy creating! Besides digis you will find Tshirts and Hoodies! Take a peek and see all the newest goodies she has in the shop,

 I made a tabletop centerpiece this week.
 I was out shopping, and I saw some pinwheels. I got the idea to make some and decorate them with this week's image. I cut the images apart and put one on each pinwheel. The sentiment is a Michael's rubber stamp that I found in the $1 bin.
 I found the little bucket on sale for $1. (Can't pass up a bargain!) I used the entire image to decorate the bucket.
 I think it makes a cute Easter Centerpiece!
Stop by the blogs of the talented DT. They are sure to inspire you! Their links are in my sidebar.


Have you checked out the Softpencil Studio yet? Elizabeth has been very busy creating! Besides digis you will find Tshirts and Hoodies! Take a peek and see all the newest goodies she has in the shop,


Stop by the blogs of the talented DT. They are sure to inspire you! Their links are in my sidebar.
CHALLENGES
Secret Crafter Saturday- Anything But a Card
Delicious Doodles- Dimensional Project
PaperPlay Challenges- Embossing
Delicious Doodles- Dimensional Project
PaperPlay Challenges- Embossing
Incy Wincy- Embossing
How did I make the pinwheels? I'll show you how!
PINWHEEL TUTORIAL

You will need: one piece of double sided patterned CS cut into a square 4 1/2" by 4 1/2", scissors, a hole punch, a pencil, one brad, one wooden skewer,

a nickel, and a glue gun.
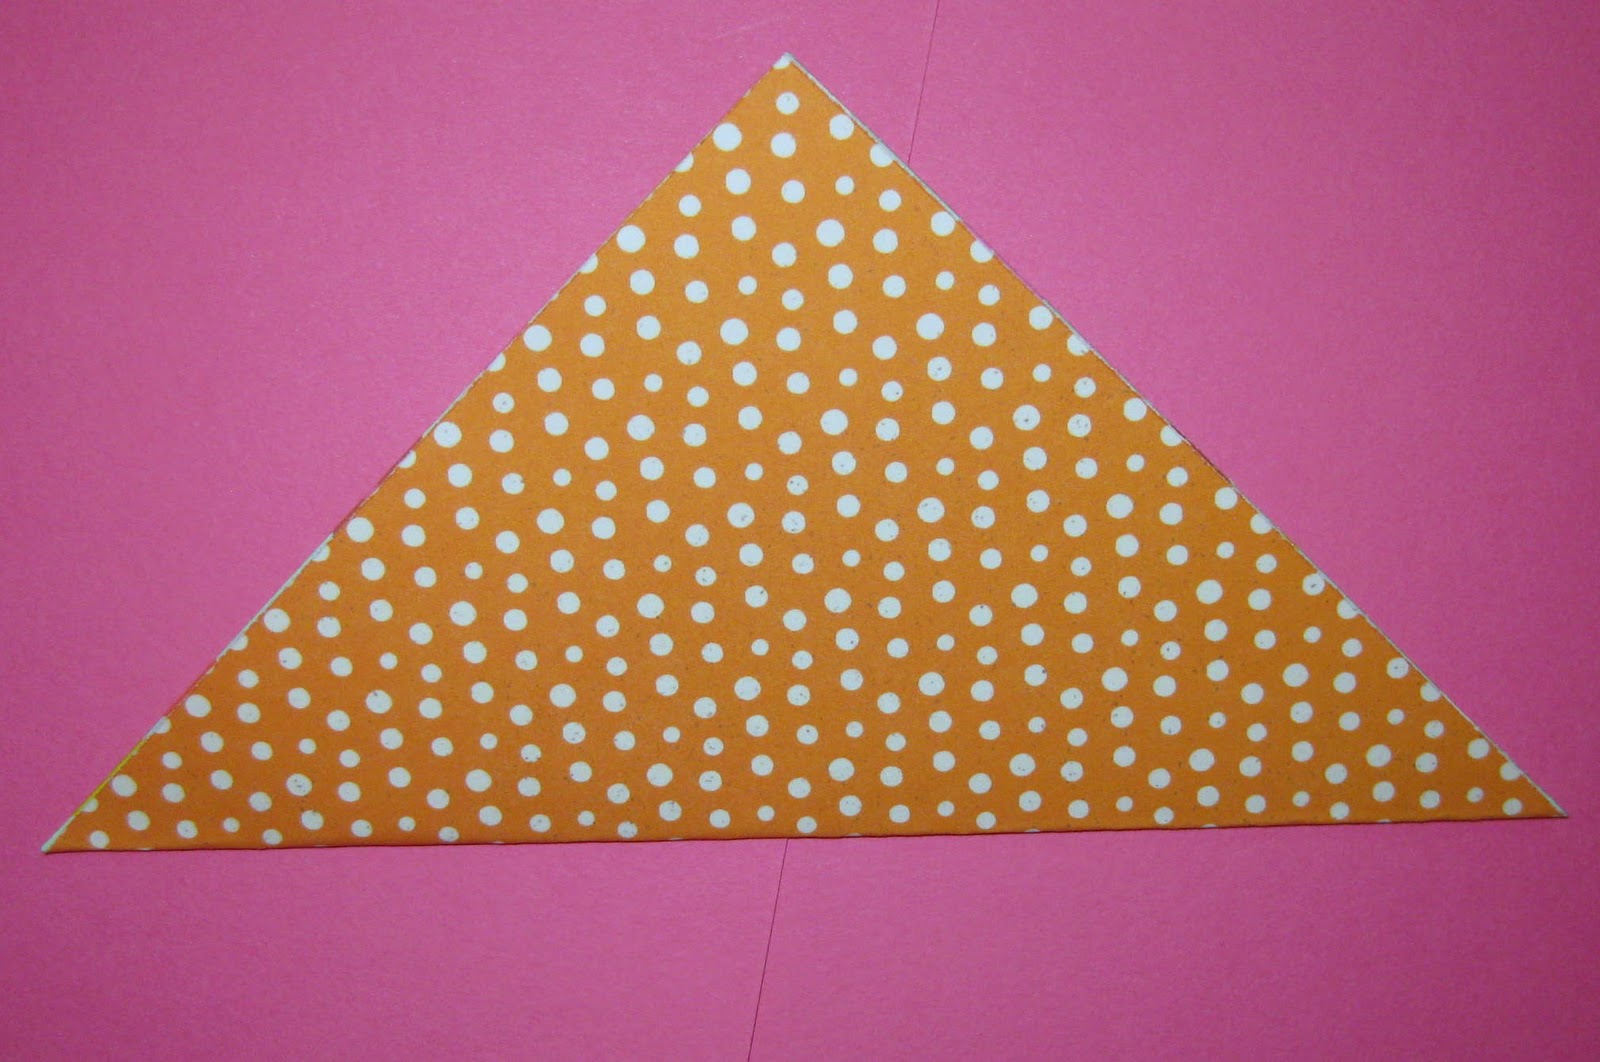
Fold the paper in half as shown.

Open the paper and fold in half in the opposite direction.

Open the paper, and using the nickel, draw a circle in the center of the square.

Using scissors, cut on the fold lines. Start on the edges and cut toward the center. Do not cut through the circle that you drew.

Now your square looks like this: four triangles connected by a center circle.

Using a pencil, draw a small dot in the left hand corner of each triangle.

With the hole punch, punch through each dot.
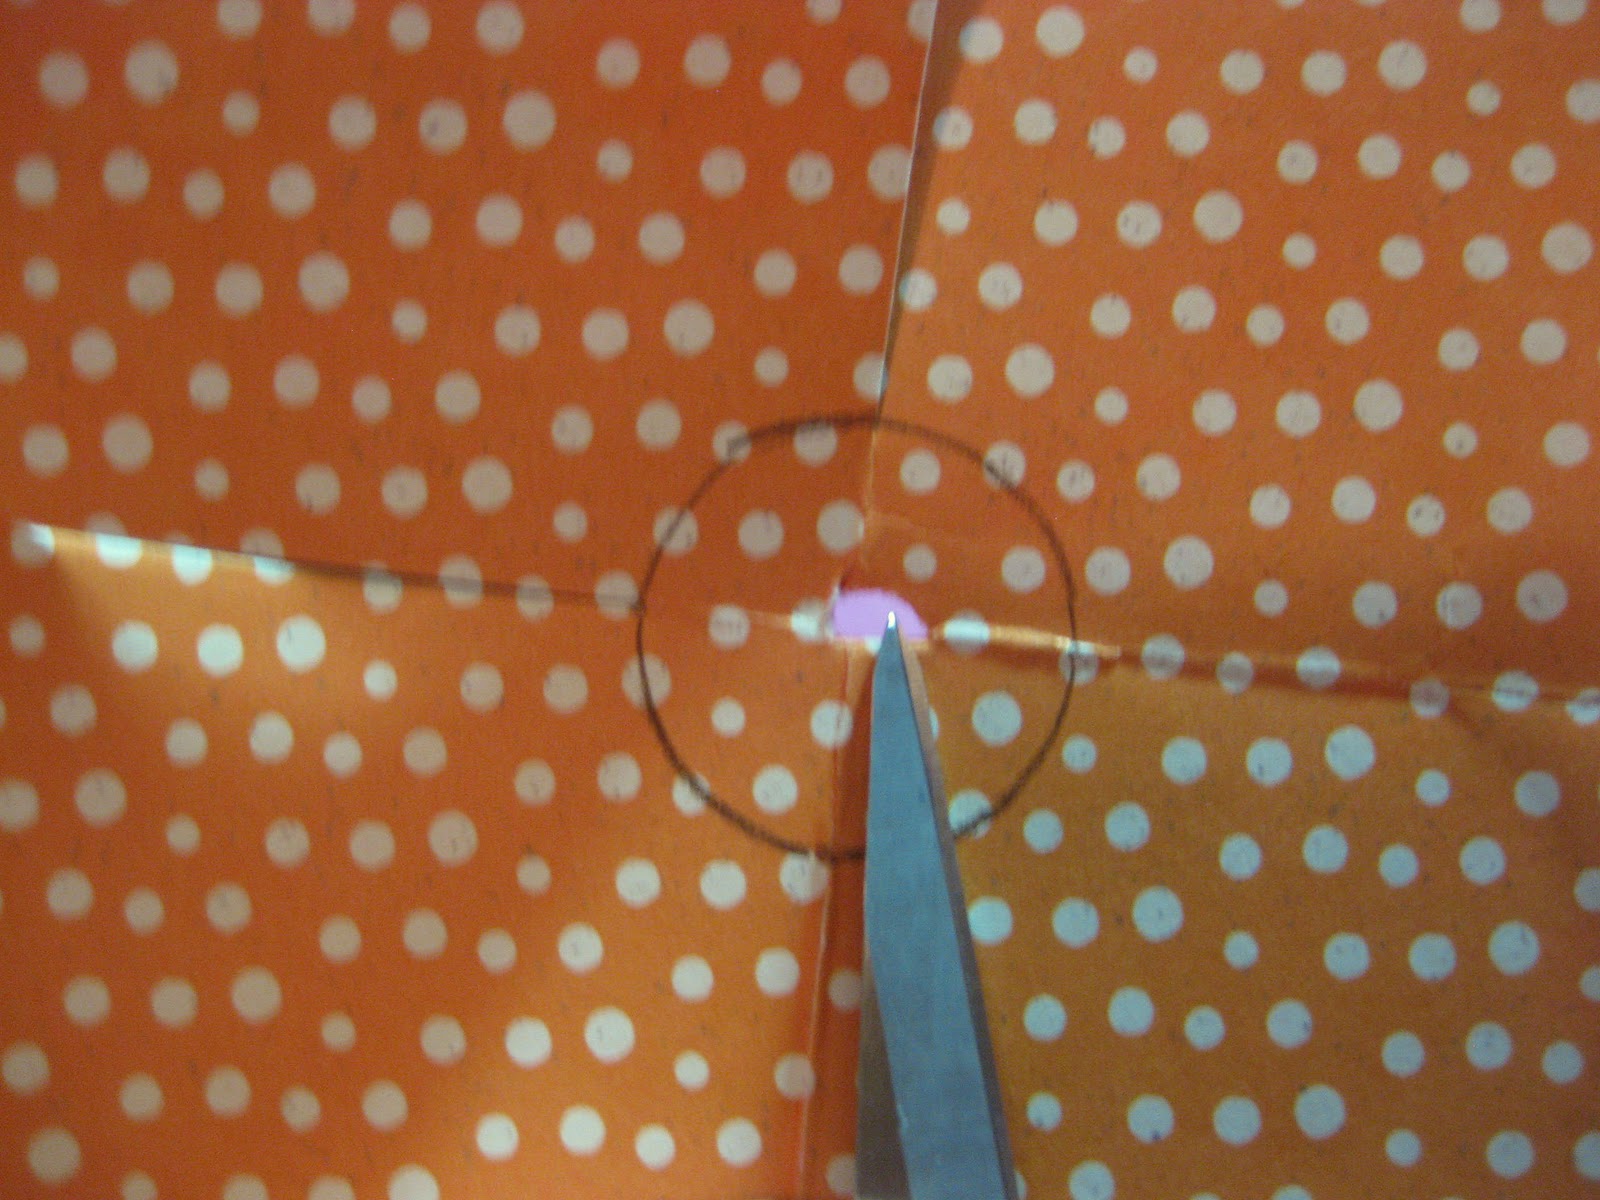
Poke a small hole in the center of the circle using scissors.

Pull one corner toward the center and place a brad in the hole. Pull another corner toward the center and place the brad through that hole.

Continue until all corners are pulled toward the center. Then push the brad through the center hole.

Turn the pinwheel over. Secure the brad by splaying the ends open.
Turn the pinwheel over again and slightly flatten it so your images can be adhered more easily.

I applied a dot of hot glue on each X (See photo).....
 and attached my image to the front.


Next,I attached a pop dot to the back with hot glue. Then I put more hot glue on top of the pop dot and attached the skewer.

I punched out a small paper heart and adhered it on top of the skewer with another dab of hot glue. I like the back of my project to look neat.
Add a ribbon, and your pinwheel is finished! This pinwheel does not spin. If you want it to spin, you need to use a long pin instead of a brad and stick it into the wooden skewer. I hope you've enjoyed my project! Happy Crafting!
Fantastic projects, TFS and for the tutorial!
ReplyDeleteThis is AMAZING! What a work of art! FAB! :)
ReplyDeleteLovely!
ReplyDeleteThanks for joining us on our "Anything but a card" challenge on SECRET CRAFTER SATURDAY CHALLENGE :)
Hugs Jane x
Oh Cat these are divine. Lovely colours and such a fabulous tutorial too. Wonderful.
ReplyDeleteHugs
Dawn x
WOW, wonderful project. LOOOOOOVE it!!
ReplyDeletehave a wonderful scrappy week :)
OMGosh this is such an amazing creation, and such lovely choice of colours,
ReplyDeletethanks for sharing with us at Secret Crafter: 126 Anything But a Card
Good luck with the challenge,
Hugs Bridget :) x.
SCSC DT
Just love it :o)
ReplyDeleteThanks for joining us at secret Crafter this week
Bea
A wonderful project. Thank you for joining us at Incy Wincy.
ReplyDeleteNikki F x
What a great fun Easter make! I love it all!
ReplyDeleteThanks for playing along with our 3D challenge this week at Delicious Doodles.
Keryn :)
Totally awesome!!! What a great tutorial!!! You ROCK!!!
ReplyDelete